
Incorporating technology into everyday life can make mundane tasks more convenient, and one area where it really shines is plant care. If you’re someone who enjoys gardening or houseplants but finds it difficult to remember to water them on time, a DIY smart plant watering system might be just the project for you. This system automatically waters your plants based on the soil’s moisture levels, ensuring that your plants stay healthy and hydrated, even if you’re away or forget to water them.
Using an Arduino microcontroller, a soil moisture sensor, and a few simple electronic components, you can build a customizable smart watering system that gives your plants the care they need.
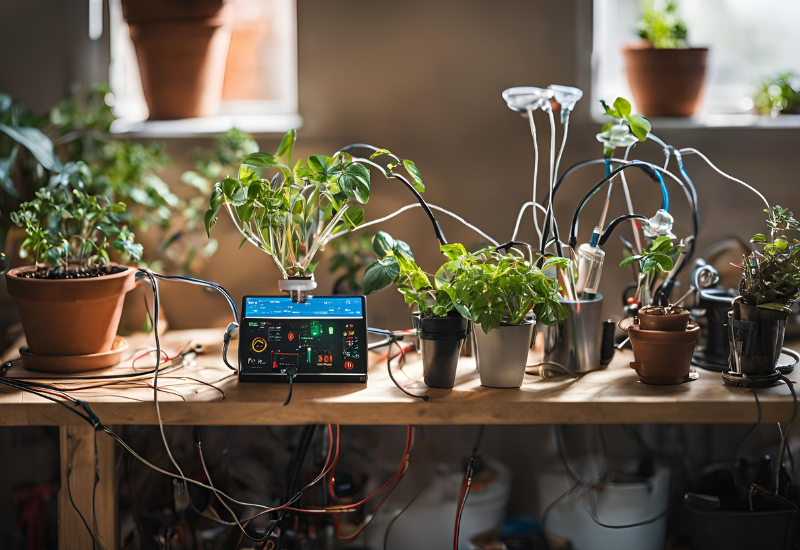
Materials Needed for the Project
Before you begin, you’ll need to gather a few key components. Most of these can be purchased online or at an electronics store. Here’s what you’ll need:
- Arduino Board: An Arduino Uno or similar model.
- Soil Moisture Sensor: To measure the soil’s moisture content.
- Water Pump: A small 5V or 12V pump to deliver water to the plants.
- Relay Module: A relay to control the water pump, as the Arduino cannot handle the pump’s power directly.
- Jumper Wires: For connecting components.
- Breadboard: For easier wiring.
- Tubing: To direct water from the pump to the plant.
- Power Supply: A 5V or 12V power source for the pump and Arduino (depending on the pump’s voltage requirements).
- Water Reservoir: A container to hold the water.
- Arduino IDE Software: For programming the Arduino.
Step 1: Setting Up the Arduino and Sensor
The Arduino will serve as the control unit for the system, and the soil moisture sensor will monitor the plant’s needs. First, let’s set up the sensor.
- Connect the Soil Moisture Sensor: The sensor typically has three pins – VCC, GND, and OUT. Use jumper wires to connect the VCC pin to the 5V pin on the Arduino, the GND pin to one of the ground (GND) pins on the Arduino, and the OUT pin to one of the analog input pins (for example, A0).
- Test the Sensor: To ensure the sensor works properly, write a simple sketch in the Arduino IDE that reads and prints the moisture level to the serial monitor.
int sensorPin = A0; // Analog input pin for soil moisture sensor
int moistureLevel;

void setup() {
  Serial.begin(9600);
}

void loop() {
  moistureLevel = analogRead(sensorPin);
  Serial.print("Moisture Level: ");
  Serial.println(moistureLevel);
  delay(1000); // Delay 1 second before taking the next reading
}
Once uploaded to the Arduino, open the serial monitor to see live data on the soil’s moisture level.
Step 2: Setting Up the Relay and Water Pump
Next, you’ll need to set up the water pump, which will be controlled by the Arduino via a relay. The relay acts as a switch that the Arduino can turn on and off to control the flow of current to the pump.
- Connect the Relay to the Arduino: The relay module usually has three input pins – VCC, GND, and IN. Connect the VCC to the 5V pin on the Arduino, the GND to the GND pin, and the IN pin to a digital pin on the Arduino (for example, pin 8).
- Wiring the Water Pump: Connect the positive terminal of the water pump to the “NO” (Normally Open) pin on the relay, and the negative terminal to the ground of the power supply. Connect the positive terminal of the power supply to the “COM” (Common) pin on the relay.
- Test the Relay: To check if the relay is working, upload the following sketch that turns the relay on and off every few seconds:
int relayPin = 8; // Digital pin connected to relay

void setup() {
  pinMode(relayPin, OUTPUT);
}

void loop() {
  digitalWrite(relayPin, HIGH); // Turn on the relay (and the pump)
  delay(3000); // Keep it on for 3 seconds
  digitalWrite(relayPin, LOW); // Turn off the relay
  delay(5000); // Wait for 5 seconds before turning it on again
}
Step 3: Integrating the Watering Logic
Now that both the sensor and pump are working, it’s time to write the final code to control when the pump activates based on the soil moisture levels.
- Determine Moisture Threshold: After observing the moisture readings in different soil conditions, decide on a threshold value for when the system should water the plants. For instance, if the soil moisture reading is below 300 (on a scale of 0 to 1023), the pump will activate to water the plants.
int sensorPin = A0;
int relayPin = 8;
int moistureLevel;
int moistureThreshold = 300; // Adjust based on your soil conditions

void setup() {
  Serial.begin(9600);
  pinMode(relayPin, OUTPUT);
  digitalWrite(relayPin, LOW); // Start with the pump off
}

void loop() {
  moistureLevel = analogRead(sensorPin);
  Serial.print("Moisture Level: ");
  Serial.println(moistureLevel);

  if (moistureLevel < moistureThreshold) {
    Serial.println("Soil is dry. Watering plant...");
    digitalWrite(relayPin, HIGH); // Turn on the pump
    delay(5000); // Water the plant for 5 seconds
    digitalWrite(relayPin, LOW);  // Turn off the pump
  }

  delay(10000); // Wait 10 seconds before checking again
}
Upload this sketch to the Arduino and monitor how the system responds to changes in soil moisture. Adjust the watering time and threshold as needed based on the type of plant and soil conditions.
Step 4: Final Assembly
Once the system is functioning correctly, you can assemble everything into a more permanent setup.
- Place the Pump: Submerge the pump into the water reservoir, making sure the tubing is directed towards the plant’s soil.
- Position the Sensor: Insert the moisture sensor deep enough into the plant’s soil so it can accurately read moisture levels.
- Enclose the Electronics: Use a small enclosure to protect the Arduino, relay, and wiring from water and dirt. Be sure to leave openings for the sensor, pump wiring, and power supply.
- Test the System: Water the plant manually to saturate the soil, and then monitor how the system responds as the soil dries. The pump should activate when the moisture level drops below the set threshold.
Step 5: Enhancements and Add-ons
To further improve your smart watering system, consider the following enhancements:
- Multiple Plant Support: Use additional moisture sensors and relays to monitor and water multiple plants from a single Arduino.
- Wi-Fi Connectivity: Integrate a Wi-Fi module like the ESP8266 to monitor soil moisture levels remotely through a web dashboard or smartphone app.
- Solar Power: If your plants are outdoors, you can make the system eco-friendly by adding a small solar panel to power the pump and Arduino.
This DIY smart plant watering system is a great beginner-to-intermediate project for anyone interested in combining technology with gardening. It not only saves time but also helps ensure your plants receive the right amount of water, improving their overall health.