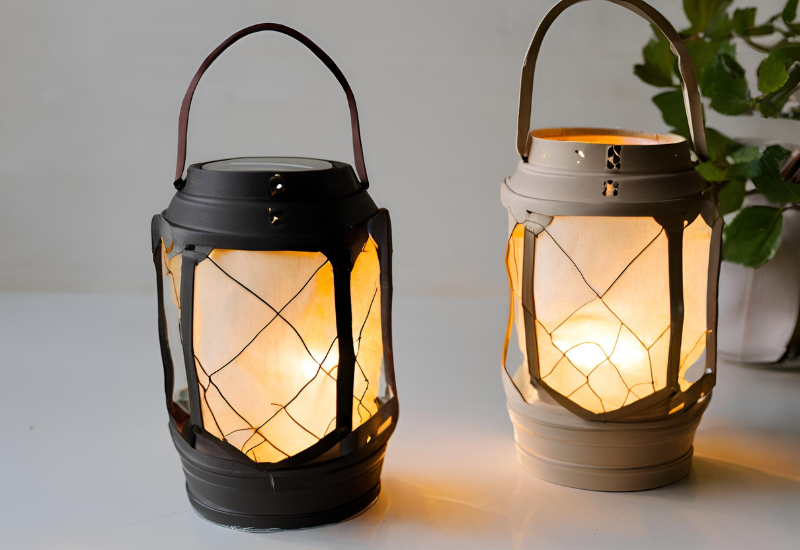
If you enjoy spending time outdoors, whether camping, hiking, or simply relaxing in your backyard, a DIY solar-powered lantern can be an invaluable addition to your gear. This project is not only simple and fun but also environmentally friendly, harnessing the power of the sun to light up your evenings. In this guide, we’ll take you step-by-step through the process of creating your own solar-powered lantern, perfect for illuminating those dark nights without the need for batteries or electricity.
What You’ll Need
Before you start building your solar lantern, gather the following materials:
- Solar Garden Light: Look for a solar-powered garden light that you can disassemble. These usually come with built-in solar panels and batteries.
- Clear Plastic Jar: A mason jar or any clear plastic container can work well. This will be the lantern body, allowing the light to shine through.
- Acrylic Paint (optional): If you want to customize the look of your lantern, you can use acrylic paint to decorate the jar.
- Decorative Elements (optional): Items like ribbons, beads, or stickers to personalize your lantern.
- Tools: Scissors, hot glue gun, and possibly a screwdriver for disassembling the solar light.
Step 1: Disassembling the Solar Garden Light
Begin by taking apart the solar garden light. Carefully unscrew the base and remove the solar panel, LED light, and rechargeable battery. Make sure to keep all parts safe, as you’ll be reusing the solar panel and LED light in your new lantern.
- Safety Tip: Be gentle when handling the solar light components to avoid breaking any parts.
Step 2: Preparing the Jar
Once you have your solar panel and light source ready, it’s time to prepare the jar:
- Clean the Jar: Ensure that your jar is clean and free of any labels or residues. A clear jar will allow the most light to shine through.
- Customize the Look (optional): If you wish to decorate the jar, use acrylic paint to add designs or patterns. You could also glue decorative elements to the outside for a personal touch. Make sure the paint is fully dry before moving to the next step.

Step 3: Installing the Solar Panel
Now that your jar is ready, it’s time to install the solar panel:
- Position the Solar Panel: The solar panel needs to be positioned so it can absorb sunlight during the day. Ideally, the panel should be on top of the jar.
- Secure the Panel: Use a hot glue gun to attach the solar panel to the lid of the jar. Ensure it is firmly in place. The panel should be facing upward to capture as much sunlight as possible.
Step 4: Wiring the LED Light
Next, wire the LED light to the solar panel:
- Connect the LED Light: Take the LED light from the solar garden light and connect it to the solar panel’s output wires. You may need to strip the ends of the wires and twist them together. Ensure you connect positive to positive and negative to negative to prevent any shorts.
- Test the Connection: Before sealing everything, test the connection by placing the jar in sunlight. The LED should light up if everything is connected correctly.
Step 5: Adding the Battery
After wiring the LED, you will also need to connect the rechargeable battery:
- Position the Battery: Place the rechargeable battery inside the jar but ensure it does not obstruct the LED light. You can use a small piece of tape to keep it secure if necessary.
Step 6: Final Assembly
With everything connected, it’s time for the final assembly:
- Seal the Jar: Once you’ve ensured that all components are securely in place and functional, screw the jar lid back on. Make sure that the solar panel is on top and that the jar is tightly sealed.
- Personalize (optional): Add any final decorative touches, like ribbons or stickers, to make your lantern unique.
Step 7: Charging and Using Your Lantern
Your DIY solar lantern is ready for use! Here’s how to get the most out of it:
- Charging: Place your lantern in a sunny spot during the day to charge the battery. The solar panel will collect energy and store it in the battery for later use.
- Using the Lantern: At night, your solar lantern will automatically light up, providing a warm glow for your outdoor activities. If your lantern has an on/off switch, use it to control when the light is activated.
Tips for Optimizing Your Solar Lantern
- Maximize Sunlight Exposure: Place your lantern in areas that receive ample sunlight throughout the day. The more sunlight it absorbs, the brighter it will shine at night.
- Use High-Quality Components: If you want better performance, consider investing in higher-quality solar panels and LED lights.
- Experiment with Different Jars: Try using different types of jars to see how they affect the light diffusion. Colored jars can create unique ambient lighting effects.
- Regular Maintenance: Keep the solar panel clean and free from dirt or debris to ensure it functions efficiently.
Safety Considerations
While building your solar lantern is a fun DIY project, it’s essential to keep safety in mind:
- Avoid Water Damage: Ensure that your components, especially the battery and solar panel, are protected from water. Consider adding a weather-resistant seal if you plan to use the lantern outdoors frequently.
- Battery Safety: Handle the rechargeable battery with care, following all safety guidelines for charging and usage.
With a little creativity and some basic materials, you can create your very own solar-powered lantern that is both functional and decorative. This DIY project not only provides a sustainable light source for your outdoor adventures but also offers a fun way to engage with solar technology. Enjoy illuminating your nights with your handcrafted lantern, and let your creativity shine!


