
Creating your own Bluetooth speaker is a fun and rewarding project that combines technology and craftsmanship. Not only will you have a custom audio device that meets your personal needs, but you’ll also gain a deeper understanding of how speakers work. In this guide, we’ll show you how to build a portable Bluetooth speaker without getting too technical or requiring coding knowledge.
What You’ll Need
Before diving into the assembly process, gather the materials you will need to create your DIY Bluetooth speaker:
- Bluetooth Audio Receiver Module: This module allows you to receive audio signals from your smartphone or other Bluetooth devices. Ensure it supports A2DP for high-quality audio streaming.
- Speaker Drivers: You’ll need one or two small speaker drivers (4 to 8 ohms, typically around 3 to 5 watts) depending on your desired sound output.
- Battery: A rechargeable lithium-ion battery (18650 or similar) will provide portable power to your speaker.
- Battery Management System (BMS): This ensures safe charging and discharging of the lithium-ion battery.
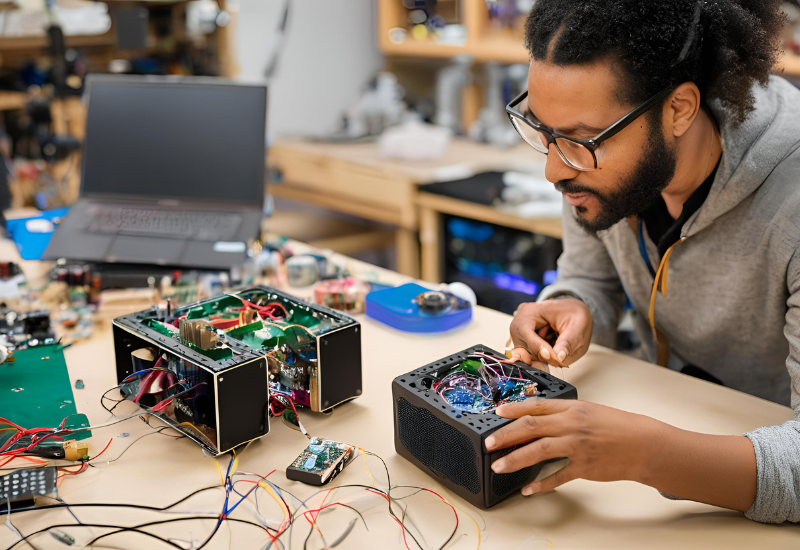
- Enclosure: A sturdy box or casing to house all the components. You can use wood, plastic, or even repurpose an old container.
- Amplifier Module: A small amplifier (such as a PAM8403) will boost the audio signal from the Bluetooth receiver to drive the speaker drivers.
- Connecting Wires: Various wires to connect the components together.
- On/Off Switch: A simple toggle switch to control power to the device.
- Charging Port: A micro USB port for charging the battery.
- Soldering Kit: A soldering iron and solder (optional, for secure connections).
- Tools: Screwdriver, wire strippers, and a hot glue gun.
Step 1: Understanding the Components
Before starting the assembly, it’s helpful to understand how each component contributes to the final product:
- Bluetooth Module: This is the heart of your speaker, allowing you to wirelessly stream music from your devices.
- Speaker Drivers: These convert electrical signals into sound. The size and quality of the speakers will significantly impact sound quality.
- Amplifier: This boosts the audio signal so that the speakers can produce louder sounds without distortion.
- Battery: Provides power for portability. The type of battery you choose will affect the playtime and charging options.
Step 2: Preparing the Enclosure
Choose an enclosure that fits your aesthetic preferences and can house all components comfortably. If you’re using wood, you might want to sand the edges for a polished look. Make sure to create or buy a cover that has openings for the speakers and the charging port.
- Cutting the Enclosure: If necessary, use a saw to cut the enclosure to size, ensuring that the speaker drivers can be mounted securely and that there’s space for the Bluetooth module, amplifier, and battery.
Step 3: Mounting the Speakers
Start by securing the speaker drivers into the enclosure:
- Speaker Placement: Decide where to place the speakers within the enclosure. For stereo sound, place them at opposite ends of the box. If you have only one speaker, center it.
- Securing the Speakers: Use screws or a hot glue gun to attach the speakers firmly to the enclosure. Ensure there are no air leaks around the edges as this can affect sound quality.
Step 4: Wiring the Components
Now it’s time to connect all the components together. Here’s a straightforward process:
- Connect the Bluetooth Module:
- Wire the output of the Bluetooth module to the input of the amplifier.
- Ensure the Bluetooth module is powered, usually connected to the positive and negative terminals of the battery.
- Wire the Amplifier:
- Connect the output of the amplifier to the speaker drivers. Ensure the polarity is correct (positive to positive, negative to negative) to avoid phase issues.
- Connect the Battery:
- Wire the battery to the BMS. This will prevent overcharging and discharging of the battery.
- Connect the BMS output to the power input of the Bluetooth module and the amplifier.
- Add the On/Off Switch:
- Include a switch in the power line from the battery to the BMS or Bluetooth module to control the power to the entire system.
- Charging Port:
- Connect the charging port to the BMS for easy recharging of your battery.
Step 5: Testing Your Connections
Before sealing up the enclosure, it’s essential to test your connections:
- Turn on the power using the switch and ensure that the Bluetooth module powers up (you should see an indicator light).
- Pair your phone with the Bluetooth speaker and play music to test the sound quality.
- Make adjustments as necessary, ensuring that all connections are secure and functioning properly.
Step 6: Sealing the Enclosure
Once you’ve confirmed that everything works, it’s time to seal the enclosure.
- Secure the Lid: If your enclosure has a removable lid, secure it in place with screws or glue.
- Add Finishing Touches: You can paint or decorate the outside of the enclosure to give it a personal touch. Consider adding rubber feet to the bottom to prevent sliding.
Step 7: Enjoying Your DIY Bluetooth Speaker
With everything in place, your DIY Bluetooth speaker is ready for use! Take it on camping trips, beach outings, or simply use it at home to enjoy your favorite tunes.
Tips for Enhancing Your Bluetooth Speaker
If you want to take your DIY project a step further, consider these enhancements:
- Add a Subwoofer: If you have enough space in your enclosure, consider adding a small subwoofer for deeper bass sounds.
- Integrate LED Lights: Adding LED lights can give your speaker a cool look and provide visual feedback when it’s powered on or charging.
- Custom Sound Settings: If you want to adjust the sound quality further, consider adding a small equalizer module to customize audio output.
Safety Precautions
While working on your DIY Bluetooth speaker, keep these safety tips in mind:
- Work in a Well-Ventilated Area: If you’re soldering, ensure proper ventilation to avoid inhaling fumes.
- Handle Batteries Carefully: Lithium-ion batteries can be dangerous if punctured or improperly handled. Follow proper safety protocols for charging and storing them.
- Disconnect Power When Working: Always ensure the power is off before making any changes to the wiring.
Creating your own Bluetooth speaker is a fulfilling project that combines creativity and technical skills. With just a few materials and a bit of effort, you can produce high-quality sound and enjoy your favorite music wherever you go. This DIY speaker is not just a testament to your skills but also a fantastic way to engage with technology sustainably. Whether you’re using it at home or on the go, this speaker will surely impress.