
In today’s technology-driven world, our dependence on smartphones and gadgets is higher than ever. But what happens when you’re camping, traveling, or just spending time outdoors and your phone battery dies? A DIY solar-powered phone charger could be your answer to staying connected even when you’re away from traditional power sources. This project is not only practical but also environmentally friendly, making use of renewable solar energy to power your devices.
In this article, we will walk you through creating your own solar-powered phone charger without needing to dive into complex coding or technical jargon. The project is simple, straightforward, and suitable for DIY enthusiasts of all skill levels.
Materials Needed for the Solar Charger
Here is a list of essential materials you will need to create a functional solar phone charger:
- Small Solar Panel: A 5V solar panel, typically around 2 to 6 watts, is enough to charge a smartphone.
- USB Charging Module: This module converts the solar panel’s output into a USB output, typically 5V, which is the standard voltage for phone charging.
- Rechargeable Battery: A 3.7V lithium-ion battery will store the energy from the solar panel and allow for charging even when the sun isn’t shining.
- Battery Protection Module: Protects the battery from overcharging or discharging, ensuring its longevity.
- Diode (optional): A Schottky diode can be used to prevent current from flowing back to the solar panel from the battery.
- Wires and Connectors: For wiring the components together.
- Enclosure: To house and protect the components. You can use a small box, such as a plastic project box, to keep everything neatly organized.
- Tools: Soldering iron (optional), hot glue gun, wire strippers, and basic tools to assemble the charger.
Step 1: Understanding the Solar Charging Process
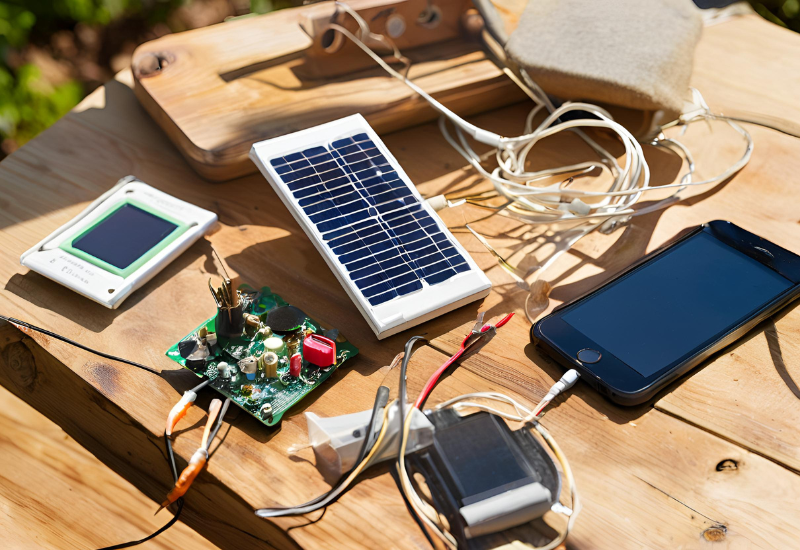
Before diving into assembly, it’s helpful to understand how this solar-powered charger works. The solar panel collects sunlight and converts it into electrical energy, which is stored in the rechargeable battery. The charging module then regulates this stored energy and provides a stable voltage through a USB port, which can be used to charge your phone or other gadgets.
Step 2: Choosing the Right Solar Panel
The solar panel is the heart of this project, so choosing the right one is crucial. A 5V solar panel is perfect for charging most smartphones, as their standard USB chargers operate at 5V. You can find panels with different wattage ratings, typically between 2 and 6 watts for this type of project. The higher the wattage, the faster the charging process will be.
- Tips for Choosing a Solar Panel:
- Look for a panel that is compact yet provides adequate power output for your needs.
- Opt for weather-resistant or waterproof solar panels if you plan to use the charger outdoors.
Step 3: Adding the USB Charging Module
Once you have your solar panel, the next component is the USB charging module. This module will convert the varying voltage from the solar panel into a consistent 5V output needed to charge phones and other devices. Most USB charging modules are already designed to output 5V and include a built-in charging port.
- Connecting the USB Module:
- Connect the positive terminal of the solar panel to the input of the USB module (labeled “VIN” or similar).
- Connect the negative terminal to the ground pin on the module.
The module should have a standard USB port that will later be used to plug in your phone charging cable.
Step 4: Using a Rechargeable Battery for Consistent Power
One of the limitations of solar energy is that it depends on sunlight. This is where the rechargeable battery comes in. By adding a 3.7V lithium-ion battery to your circuit, you can store energy during sunny periods and use it to charge your phone even when there’s no sun.
- Connecting the Battery:
- Attach the battery’s positive and negative terminals to the input side of a battery protection module. This module prevents the battery from overcharging or discharging too much, which could damage the battery.
- The output of the battery protection module is then connected to the USB charging module, providing a steady power source.
Step 5: Optional Diode for Power Flow Control
To ensure that current only flows from the solar panel to the battery (and not in reverse), you can add a Schottky diode in the circuit. This component prevents the battery from discharging back into the solar panel when it’s not generating power, such as at night or during cloudy conditions.
- Installing the Diode:
- Place the diode between the positive terminal of the solar panel and the battery to ensure the current only flows in one direction.
Step 6: Assembling the Charger
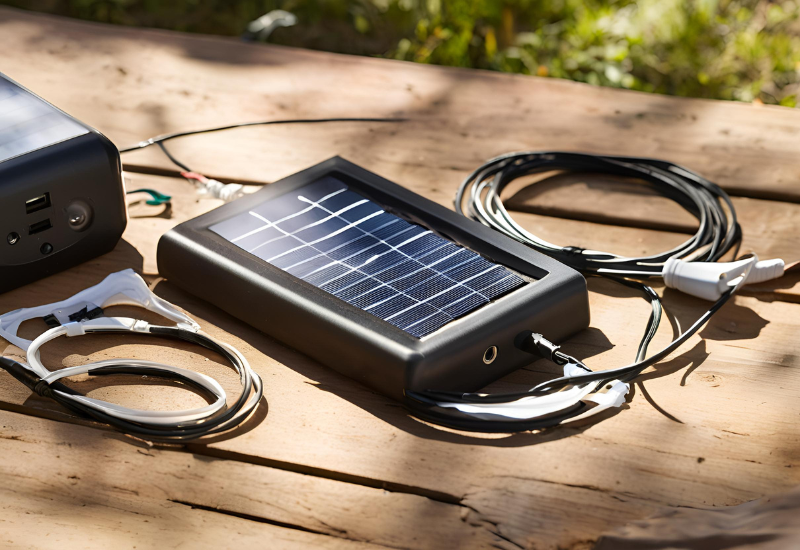
Now that all components are connected, it’s time to assemble the charger into its enclosure. Use a small plastic or metal project box to protect the components. Ensure that the solar panel is placed on the outside of the box, facing up to collect sunlight efficiently.
- Tips for Assembly:
- Use hot glue or screws to secure the solar panel and other components inside the box.
- Make sure the USB port is accessible through the enclosure, allowing you to easily plug in your phone.
- Cut small openings for wires and ensure everything is neatly organized inside.
Step 7: Testing the Solar Charger
Once your DIY solar charger is assembled, it’s time to test it! Place the solar panel under direct sunlight and use a multimeter to check the voltage output. The battery should start storing energy, and the USB module should output 5V.
- Charging a Device:
- Plug your phone’s USB charging cable into the USB port and watch the magic happen as your phone begins charging from the power of the sun.
If your phone charges successfully, your DIY solar-powered phone charger is complete!
Step 8: Enhancing the Design
There are several ways you can enhance this basic solar charger design:
- Add Multiple USB Ports: If you need to charge more than one device at a time, you can add additional USB ports to the charger.
- Use a Larger Battery: If you need more power storage, upgrade to a higher capacity lithium-ion battery.
- Include LED Indicators: Adding LEDs can provide visual feedback on charging status or indicate when the battery is full or empty.
- Waterproofing: If you plan to use the charger outdoors frequently, consider using waterproof enclosures and components to protect it from the elements.
This DIY solar-powered phone charger is a simple yet highly practical project that can provide free, renewable energy wherever you go. Whether you’re an outdoor enthusiast or just looking for an eco-friendly way to charge your phone, this project offers a fun and educational introduction to solar technology. Plus, you’ll save money by building your own charger instead of purchasing an expensive commercial one.